When we wanna implement a new feature, we should start from an acceptance test. The acceptance test should contains all possible scenarios to make sure when it is passed, there is a sign for us that the feature is completed. And BDD is good way to write acceptance tests.
Theory about BDD, you can find out here but in this post, I will show you a small example how to do BDD with SpecFlow and ASP.NET MVC. The nice thing is SpecFlow provides Visual Studio template and you also can run the test with your test runner, like ReSharper or Test Driven .NET.
In this example, we will test when user opens Product page, the application should open it, not the other one. To do this example, I assume that you already install SpecFlow on your PC. If you didn’t have SpecFlow yet, you can grab it from its web site and it’s quite easy to install. Let’s start.
First we create an empty solution, and name it BddDemo.

Figure 1
Then we add a new ASP.NET MVC 2 Web Application with name BddDemo.Web.

Figure 2
Then we add a new Class Library project with name BddDemo.Specs.
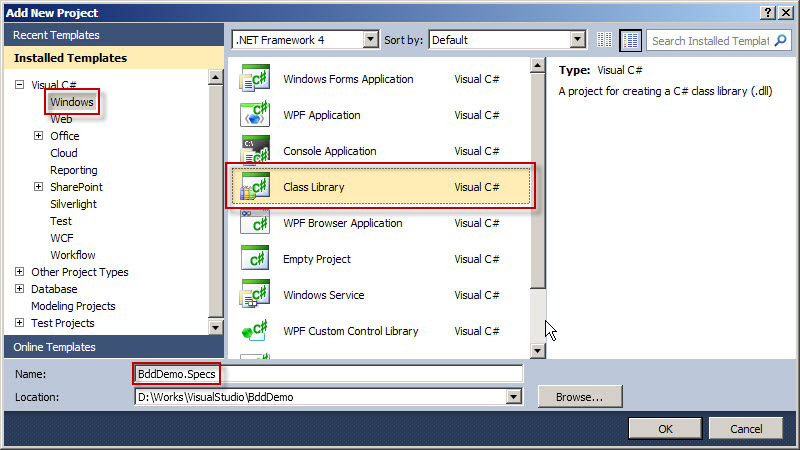
Figure 3
Remove Class1.cs, it’s redundant.
Add reference to SpecFlow, NUnit, System.Web.Mvc and BddDemo.Web.
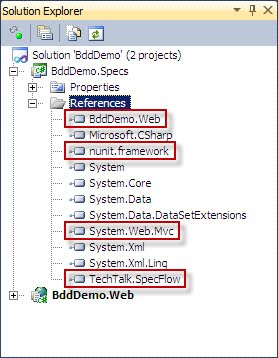
Figure 4
Add BrowseProductPage.feature by using SpecFlowFeature template.

Figure 5
Replace the content of BrowseProductPage.feature by this fragment and save it.
Feature: Browse product page

Scenario: Browse product page
    When I open product page
    Then the product page should be displayed
Open BrowseProductPage.feature.cs, you should see the test code. Try to run it, the test should be ignored because we didn’t implement test steps yet.

Figure 6
Add BrowseProductPageSteps.cs by using SpecFlowStepDefinition template to implment test steps.

Figure 7
Replace content of BrowseProductPageSteps.cs by this code fragment as save it.
using TechTalk.SpecFlow;

namespace BddDemo.Specs
{
    [Binding]
    public class BrowseProductPageSteps
    {
        [When("I open product page")]
        public void WhenIOpenProductPage()
        {
            //TODO: implement act (action) logic

            ScenarioContext.Current.Pending();
        }

        [Then("the product page should be displayed")]
        public void ThenTheProductPageShouldBeDisplayed()
        {
            //TODO: implement assert (verification) logic

            ScenarioContext.Current.Pending();
        }
    }
}
Run the test once again, it is still ignored because we didn’t have any logic yet. Now it’s time to write it. Replace content of BrowseProductPageSteps.cs by below fragment as save it.
using System.Web.Mvc;
using BddDemo.Web.Controllers;
using NUnit.Framework;
using TechTalk.SpecFlow;

namespace BddDemo.Specs
{
    [Binding]
    public class BrowseProductPageSteps
    {
        private readonly ProductController _controller = new ProductController();
        private ViewResult _result;

        [When("I open product page")]
        public void WhenIOpenProductPage()
        {
            _result = _controller.List();
        }

        [Then("the product page should be displayed")]
        public void ThenTheProductPageShouldBeDisplayed()
        {
            Assert.IsEmpty(_result.ViewName, "Wrong view name.");
            Assert.AreEqual("Product", _controller.ViewData["title"], "Wrong page was shown.");
        }
    }
}
If we try to compile the project now, for sure, it will fail because we don’t have ProductController yet. Let’s add it to BddDemo.Web project. Right click on Controllers folder in BddDemo.Web project the click Add, Controller. In Add Controller dialog, please name controller as ProductController.

Figure 8
Replace ProductController.cs content by
using System.Web.Mvc;

namespace BddDemo.Web.Controllers
{
    public class ProductController : Controller
    {
        public ViewResult List()
        {
            ViewData["title"] = "Product";

            return View();
        }

    }
}
To keep it simple, I don’t implement any special logic for ProductController’s List(). I only set value for the “title” view data, this one will be used to validated that it’s Product page.
As we didn’t have List view, ReSharper asks us to create it. Press Alt + Enter on “View()”, then select Create view ‘List’, then just click OK in Creating ASP.NET MVC View dialog. The List view will be created.
Back to BrowseProductPageSteps.cs, I use ReSharper quick fix to import BddDemo.Web.Controllers namespace.
Now try to run the test, it should pass and your customer should be happy.

Figure 9
You can download the source code for this post here: BddDemo.zip
Update: Link to source code